坦克射手 - 初学者教程
这个教程将帮助您熟悉GDevelop的工作方式。您将创建一个非常简单的游戏。在这个游戏中,敌人将朝着玩家移动。玩家将能够射击敌人。当敌人被玩家的子弹击中时,它们将爆炸。
要了解软件的概览,建议您首先阅读入门指南页面。
下载 GDevelop
如果您没有GDevelop,请从官方网站下载:gdevelop-app.com
始终从该页面下载GD,以确保您拥有最新版本。安装好GDevelop后,启动它。将显示界面的“开始”页面:
下载源码
您可以从这里下载完成的项目:beginner tutorial.zip。下载完成的项目有助于您查看游戏是如何创建的。在您卡住或不理解某些内容时,作为示例,这是检查您进展的好方法。
创建新项目
在“开始”页面上点击“创建新项目”。
接下来,您可以选择使用模板创建新项目或创建“空游戏”项目。
对于本教程,您需要一个空游戏项目,但在选择此选项之前,您需要选择保存游戏的文件夹。在“创建新游戏”页面的底部,您会找到“选择文件夹”区域。您可能需要向下滚动才能看到此选项。保持默认位置或选择您想要保存游戏的位置。
要选择自定义位置,请选择/单击“选择文件夹”按钮。浏览您计算机上的文件系统。定位您想要使用的文件夹。
选择了文件夹后,选择/单击列表中的空白“空游戏”项目选项。
创建新场景
创建新场景是您的首要任务。在项目管理器中点击/选择“点击添加场景”按钮:
接下来,点击您刚创建的NewScene。它将打开“场景”编辑器。
获取图片和资源
在继续之前,您需要为游戏准备一些图片。您可以在此处下载它们:下载图片
下载了这个文件后,将其内容解压缩到您创建项目的文件夹中。
创建玩家炮塔
玩家将控制一个炮塔来射击敌人。在场景“对象”编辑器中选择“添加新对象”。
首先创建一个精灵对象。从弹出列表中选择“精灵”。接下来,将显示对象属性面板。如果您没有看到属性面板,请在对象编辑器中右键单击NewObject,并从弹出的列表中选择“编辑对象”。
最后,我们想为对象添加一个动画。点击/选择属性窗口中的“添加动画”按钮。
您现在将看到对象的动画属性。
您需要将炮塔图像作为动画添加。点击大加号符号!
最后,点击“应用”保存更改。
重命名对象。在场景“对象”编辑器中右键单击炮塔对象。选择显示的弹出列表中的“重命名”。键入新名称“炮塔”。这样我们以后可以使用名称“炮塔”来引用这个对象。
将炮塔添加到场景中
要将“炮塔”添加到场景中,请在场景“对象”编辑器中选择/单击炮塔,然后单击“场景”编辑器。此操作将在场景中创建一个“炮塔”。然后可以选择、移动和旋转“炮塔”。
第一个事件
现在我们将创建用于动画整个游戏的“事件”。在第一个事件中,“炮塔”必须朝向玩家的鼠标旋转。
通过单击“NEWSCENE(EVENTS)”选项卡选择“事件”编辑器:
您将在“事件”编辑器屏幕顶部看到一个工具栏。单击工具栏上的“添加事件”按钮以创建新事件。如果您忘记了工具栏上的每个工具如何使用,请将鼠标悬停在工具图像上,以查看工具的弹出帮助描述。
新“事件”已创建,具有空条件和空动作。“条件”位于屏幕左侧。“动作”位于屏幕右侧。将光标放在右侧的“动作”上。选择/单击“添加动作”:
现在,您将编写第一个动作。此动作将使“炮塔”朝向鼠标旋转。点击/选择“添加动作”后,将出现一个新列表面板。选择“所有对象的通用动作”。将显示更多选项的下拉列表。选择/单击“角度”。将显示另一个下拉列表。选择/单击“朝着位置旋转”。
为下一个参数输入 MouseX() 和 MouseY(),使对象朝向鼠标位置。游戏启动时,这两个表达式将获取鼠标的当前X和Y位置。“角速度”输入0。 “角速度0”意味着对象会立即旋转。这是我们需要旋转“炮塔”的方式。要控制对象旋转的速度,请输入较小的值作为“角速度”。例如,为了减慢炮塔对象的旋转速度,请输入值100。在这一点上,事件的参数将如下图所示: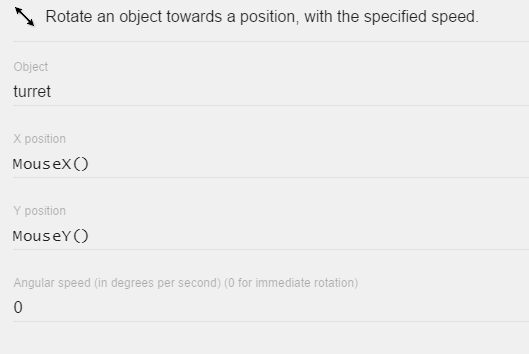
我们一直在使用表达式来获取鼠标的X和Y位置。您可以通过单击值字段旁边的蓝色图标进入“表达式”编辑器查找更多表达式:![]()
单击“表达式”编辑器图标后,您可以搜索所有可用的表达式。表达式被分类整理。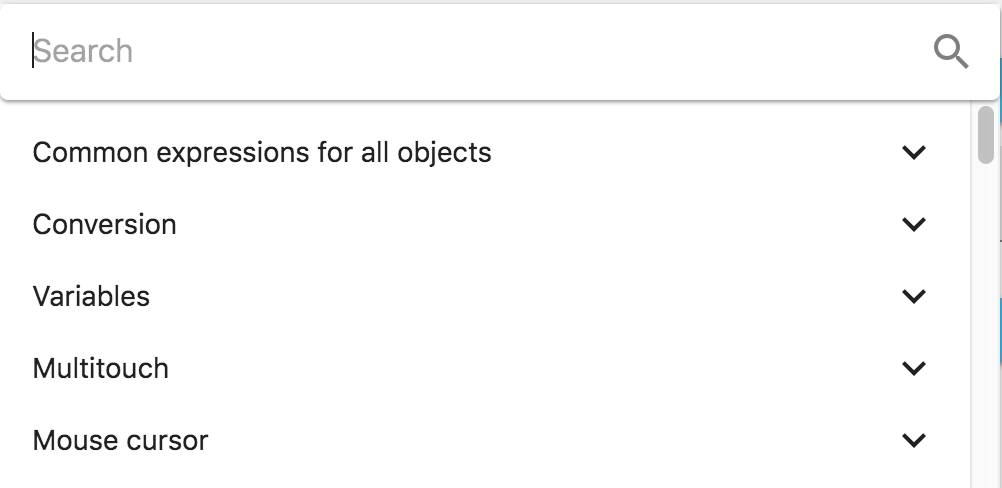
要保存对“表达式”编辑器所做的更改,请选择/单击面板右下角的“确定”按钮。
现在,您可以通过按位于场景上方的工具栏上的“预览”按钮来运行预览。
"炮塔"现在将朝向鼠标位置旋转。如果旋转不起作用,请仔细查看上述步骤,或者参考完成的教程。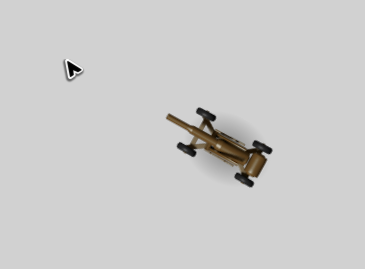
用炮塔发射子弹
我们希望玩家能够向敌人发射子弹。为此,您需要一个新的“子弹”对象。在GD界面右侧的场景“对象”列表中,单击“炮塔”对象。选择“添加新对象”或者,另外,单击“添加新对象”按钮。选择“Sprite”从弹出列表面板。现在,通过选择添加按钮添加动画。选择“Bullet.png”图像。将新对象重命名为“bullet”。如果需要帮助添加新对象,请参考上面关于“炮塔”对象的解释。
下一个所需的事件将检查鼠标左键是否被点击/按下。如果被按下/点击,动作将创建要发射的子弹。转到“NEWSCENE(事件)”选项卡。添加新事件。再次,如果需要额外帮助,请参考上述“炮塔”事件。在事件中,“创建一个新对象”将是第一个动作。此动作位于“Common actions for all objects”“Objects”面板中。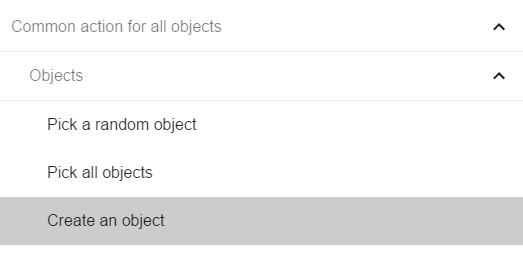
当选择“创建一个新对象”时,选择器面板右侧将会打开另一个选择列表。它显示动作的名称以及动作的参数。通过选择/单击“对象”来填写第一个参数。“bullet”将从可用对象列表中弹出。从列表中选择“bullet”。
由于游戏中只有一个图层,因此不需要图层参数。单击“确定”以完成动作。
然后在第一个动作之后添加另一个动作。_不要_创建另一个事件。单击第一个动作下方的“添加动作”!
这次,选择名为“Common action for all objects”“Movement”,“添加一个力(角度)”的动作。
GDevelop提供了一个内置的力系统。这个系统允许您轻松移动游戏对象。在我们的情况下,当子弹被发射时,此动作将用于将子弹向鼠标移动。在“Object”中输入“bullet”,这样GDevelop会将子弹移动到上一个动作中创建的子弹。
对于“运动角度”,我们将放置与炮塔相同的角度。在第2个参数中输入“turret.Angle()”。对于第3个参数,输入“400”。子弹将以每秒400像素的速度移动。最后,单击“Permanent”选项。最后一个参数告诉力始终施加在子弹上。在运动开始后,此参数使子弹持续移动。
我们的两个动作在玩家开火时启动。即:按下鼠标的左键。要在“事件”编辑器中创建此事件,我们需要添加一个条件到事件中,单击/选择“添加条件”。
选择条件“鼠标和触摸”“鼠标按钮被按下或触摸保持”。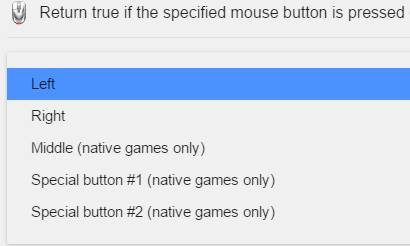 最后,单击“确定”按钮关闭窗口。条件现在已添加到事件中。
如果现在预览游戏,会发现我们有两个问题:
- 子弹射出太快。
- 子弹出现在对象的原点。这使得子弹看起来不真实。
为了解决子弹射出太快的问题,我们将使用一个计时器。向我们已创建的最后一个事件添加第二个条件。选择在“定时器和时间”类别内的条件“场景计时器的值”。
面板将显示在右侧。第一个参数“Object”表示对象的名称。留空。第二个参数“计时器名称”是计时器的名称。输入“firerate”。“时间(秒)”中输入0.25作为第三个参数。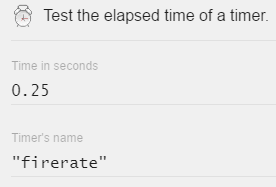
我们还没有完成!我们希望每0.25秒发射子弹。为此,我们需要重置计时器,在0.25秒后从0开始。因此,让我们添加一个动作:“定时器和时间”“启动(或重置)场景计时器”。此动作将放置在同一事件中的我们“运动”动作下方。
我们现在必须设置子弹如何从炮塔的炮筒发射。In order to do that, we are going to add a custom point to our "turret" object. We then create the bullets in the position of that point. Let's open the object properties by right-clicking the "turret" object on the right side of the Scene Interface screen. Select Edit object from the popup list. This selection brings up the window where we add animations to our objects. We will see a button called "EDIT POINTS". 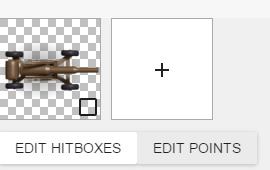
After clicking the button, we can see that our object currently has 2 points by default, the "Origin" point, and the "Centre" Point.  We can not rename these points but we can change their default position. In this case, we will add one more point to the object.
Let's click the "add" button (plus symbol) to add a custom point to our "turret" object. We immediately see the new point added to the list. It can be identified by the name "Point" and position 0,0. Let's rename this point to "Canon" and set the X position to be 110 and the Y position to be 35 
Now, when we preview the game, we will see our custom point located at the end of our canon  Close the window and apply the changes.
The only thing is left to do is to tell GDevelop to fire the bullets from the "Canon" point of the "turret" object. So in our "create bullet" action, we need to change turret.X() and turret.Y() expressions, to turret.PointX("Canon") and turret.PointY("Canon"). We can change them by clicking the expressions inside the editor.  //Don't forget the capital C in Canon as the name of the points are case sensitive.//
If we run the preview now, our bullets should be fired from the 'Canon" of the "turret" but you may notice, at times, the bullet is a bit offset. This happens because the origin point of the bullet is at the top left corner. The same way we did with the Canon point for the turret, change the position of the Origin point of the bullet to be in the middle. 
Creating enemies attacking the turret
First, we must create the objects used for the enemies: Add an object to the object list ( Right-click on an existing object > Add an object. Choose a Sprite object as before. ). Name it "enemy".
Edit the object (right click in the list and select Edit object from the list) next add an animation to the object and two images: tank2fr1.png and tank2fr2.png.

Then, change the time between the images to 0.05 and change the animation to Loop to make the animation repeat.

Click "Apply" when you are done.
Stop! Save time!
Before going any further, remember to save frequently: Click File and then Save to save your project. 
Enemy AI
Let's go back to the game. We want the enemies to move toward the turret. Go to the "Event" editor and Add a new event. We want to create an enemy every second. Add a condition, that can be found in category "Timers and time", called "Value of a scene timer". Enter 1 as the "Time in seconds" and "EnemyCreation" for the "Timer's name". //Don't forget the quotes when you enter the name of the timer.//
The next step is to add an action to create an enemy object. Click on "Add an action". Search for "Common action for all objects", "Objects" and choose "Create an object". Select "enemy" in the first "Object to create" parameter.
For the second "X position" parameter, enter the expression Random(800). This expression will return a random number between 0 and 800. When each enemy is created, it will have a different screen position.
For the Y position, enter -50. This value will create the enemies outside of the screen area. Creating the enemies off screen keeps the game's player from feeling that an enemy tank appeared from nowhere.
Finally, let's add an action to reset the timer ( "Timers and time", "Start (or reset) a scene timer"). Enter “EnemyCreation” as the name of the timer. Again, don't forget the quotes when you enter the name of the timer.
At this point, our event will look like this: 
If we run a preview now, we won't notice anything. Since the enemies are created off the screen, they can't be seen. In order to see the enemy, we need to move the enemies toward the player.
To do this, add another event. This event has no condition. Choose "Add action". Select "Common action for all objects", "Movement" and choose "Add a force to move toward an object". 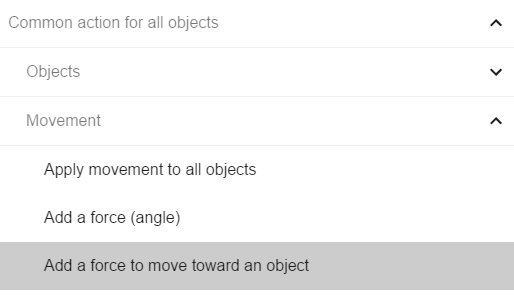
On the right side panel of the "Add a force to move toward an object", select "enemy" for the first parameter. Select "turret" for the second parameter. Enter 150 pixels per second for speed. Since the force will be applied at every single frame of the game (as there are no conditions), choose "Instant" for this force.
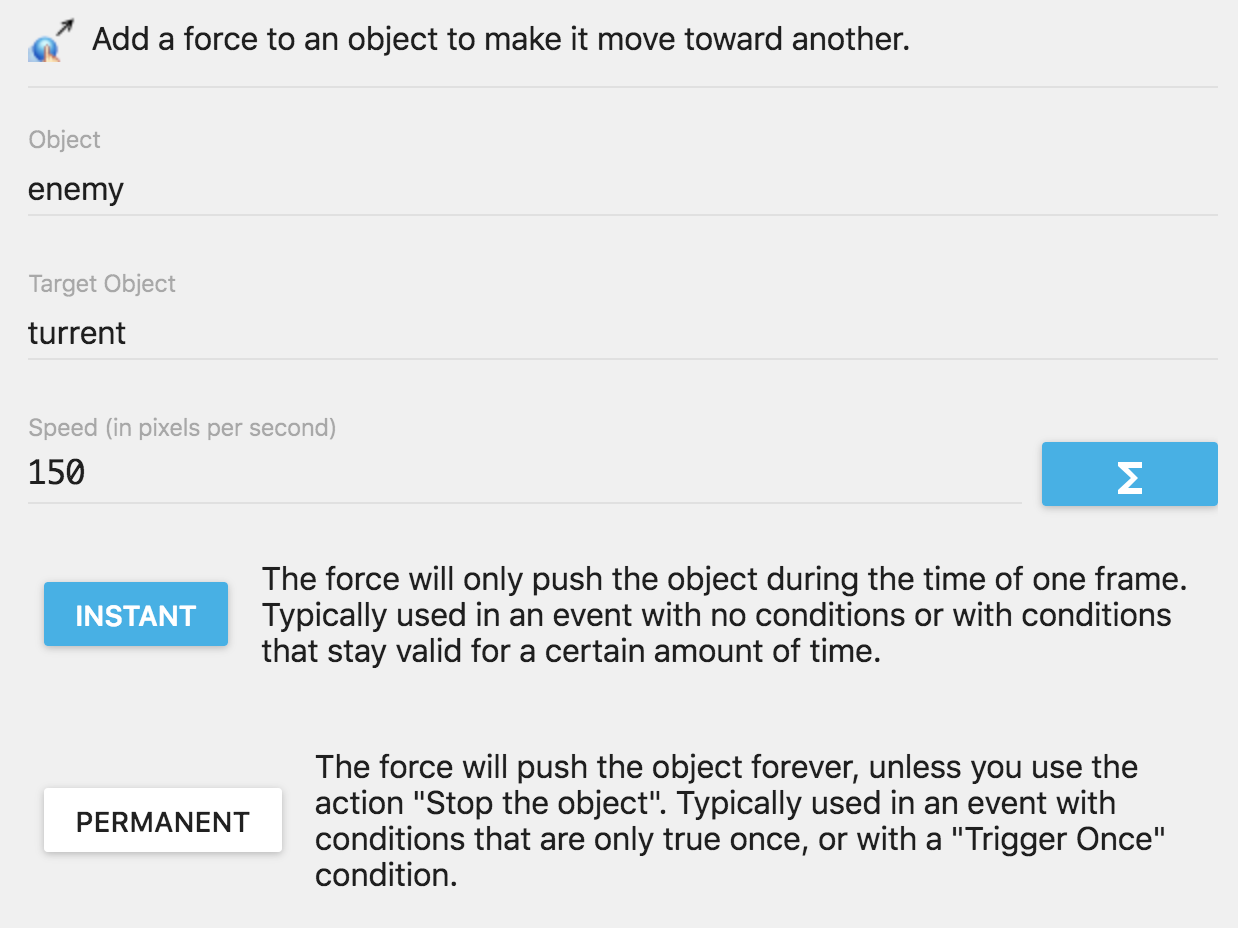
Now, if we run a preview, we will see that our enemies moving toward the turret. However, you might notice that the enemies don't actually rotate toward the turret. Let's do something about that.
Add a second action after the movement: "Common action for all objects", "Angle", "Rotate toward position". For the first parameter on the right of the panel, select "enemy". We want to rotate the enemy. For the X and Y position, we are going to use an expression to get the Centre point of the turret and make the enemies rotate toward that point with an angular speed of 0. An angular speed of 0 causes immediate object rotation.
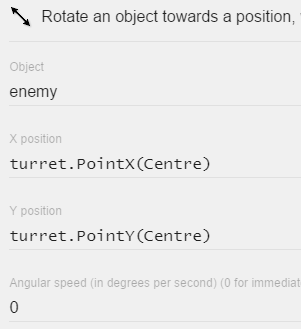
此时,我们的敌人事件将如下所示:

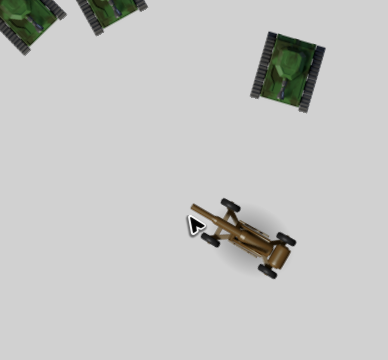
如果现在运行预览,我们的敌人将会朝着炮塔移动和旋转。
添加爆炸效果
现在是摧毁坦克的时候了!首先,当子弹与坦克碰撞时,我们需要在坦克的位置添加一个爆炸效果。添加一个新的精灵对象,命名为"explosion",并将所有图像添加到动画中,以Explosion_开头!
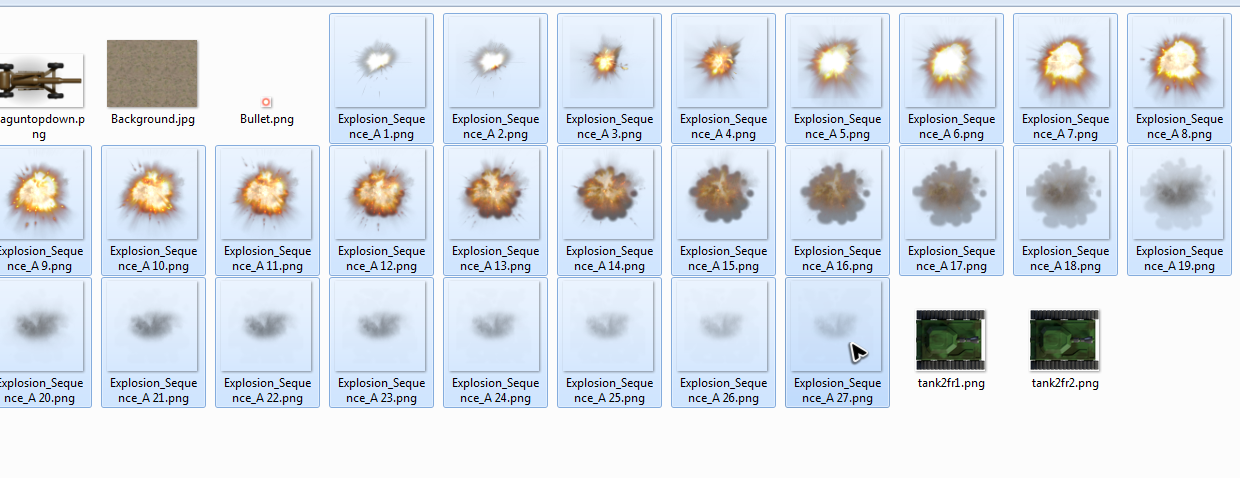
将所有图像添加到动画后,将图像之间的时间设置为0.01秒。

通过点击/选择"应用"保存动画。
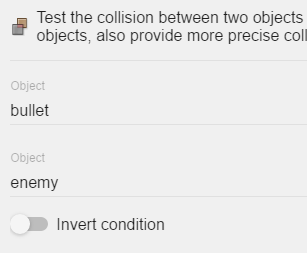
接下来,我们希望在子弹与敌人发生碰撞时创建爆炸效果。添加一个新的空条件:"所有对象的共同条件","碰撞",碰撞。
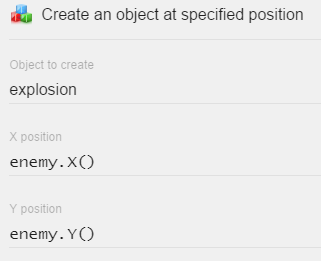
添加一个动作来以与创建子弹和敌人相同的方式创建爆炸效果对象。对于X和Y位置,请使用表达式enemy.X()和enemy.Y()。这个表达式将获取与子弹碰撞的敌人对象的X和Y位置。
最后,创建爆炸对象之后,添加动作Common actions for all objects > Object > Delete an object,并在右侧的参数中选择对象enemy,因为我们想要删除敌人。再次添加相同的动作,以在删除敌人后也删除子弹。此时,我们的事件应如下所示:

如果现在运行预览,你会注意到几个问题:
- 第一,爆炸对象并不是完全在敌人的位置创建的。
- 第二,创建的爆炸对象仍然留在场景中。要解决“爆炸”对象留在场景中的第一个问题,我们需要在动画完成后删除爆炸对象。添加一个新的空事件和条件"精灵","动画和图像","动画完成"。
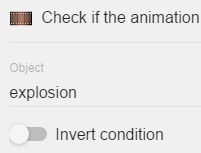
添加动作"删除爆炸对象"以删除动画。
要解决第二个问题,我们首先需要了解其原因。当我们创建爆炸对象时,我们使用了表达式enemy.X()和enemy.Y()。我们将爆炸对象创建在“敌人”对象的“原点”处。默认情况下,“原点”位于“敌人”左上角(0)处。我们也是从它们的“原点”即爆炸对象的左上角(0)创建爆炸。
为了解决这个问题,我们需要改变爆炸效果的“原点”位置。这个“原点”需要放置在物体的正中央。您需要通过右键单击对象并从列表中选择“编辑对象”来编辑“爆炸”对象。在接下来的窗口中,选择“编辑点”。
现在,将“原点”点的X和Y位置改为120。这将把点设置在“爆炸”图像的中心。

最后,不要再在“敌人”的“原点”创建“爆炸”对象,而是需要在“中心点”创建。将创建爆炸的动作中的表达式从enemy.X()更改为enemy.PointX("Centre"),从enemy.Y()更改为enemy.PointY("Centre")!

如果现在运行预览,我们的敌人将逼真地从对象的中心爆炸。
添加更多爆炸效果和游戏结束
到目前为止,玩家无法死亡。当一个敌方坦克击中玩家的炮塔时,我们希望炮塔被摧毁。添加一个新的事件。按照创建摧毁敌人事件的步骤进行。
- 添加一个条件以测试坦克与炮塔之间的碰撞。
- 在炮塔位置创建一个爆炸效果。
- 添加动作摧毁炮塔。
此外,当炮塔被摧毁时显示“游戏结束”文本会很有趣:使用场景对象列表添加一个新对象。这次选择一个“文本”对象。命名为“Game Over”。
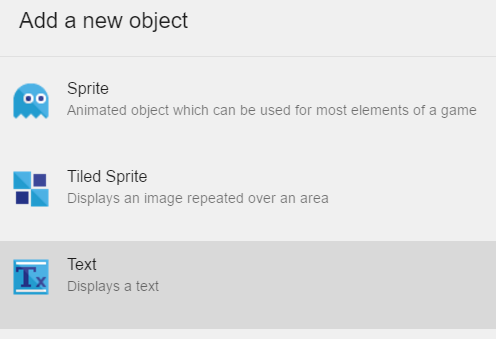
通过右键单击对象编辑“Game Over”对象。从弹出列表中选择“编辑对象”。现在,将文本更改为“游戏结束”,将文本颜色更改为红色,将文本大小更改为40。

最后,将“Game Over”文本对象添加到场景中。
下一步是隐藏文本对象。然后,如果场景中没有炮塔(也就是说炮塔被摧毁了),我们将显示它。添加一个新的空事件,并添加条件“场景”,“在场景的开头”。

该条件没有参数。它唯一的作用是在场景开始时执行一次动作。接下来,在“在场景开始时”事件中添加动作。“所有对象的常见动作”,“可见性”,“隐藏”。
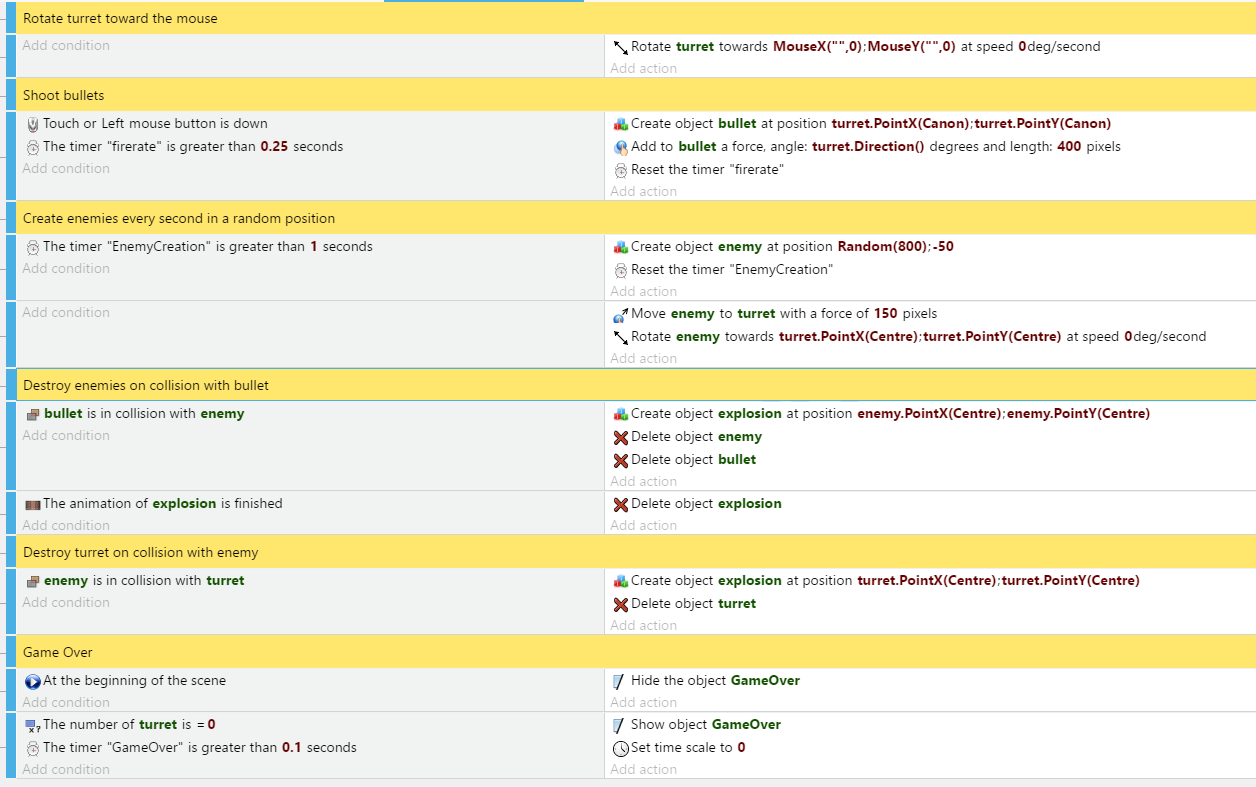
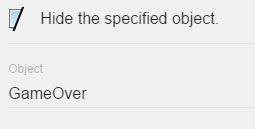 如果场景中没有炮塔,则显示“游戏结束”文本对象。 添加一个空事件。 添加条件“全部对象的常见条件”,“对象”,“对象计数”。“选择右侧的第一个参数为炮塔对象,选择测试符号为等号,选择测试值为0,因为我们要测试场景中的炮塔数量是否为0。 然后添加动作“所有对象的常见动作”>可见性>显示,并选择参数为“游戏结束”对象。 最后,添加第二个条件“定时器和时间”,“场景定时器的值”。 为时间参数输入0.1,为名称参数输入“游戏结束”。 添加第二个动作:“定时器和时间”,“更改时间比例”。 输入参数0以在0.1秒后停止游戏并显示“游戏结束”文本。你可以通过将鼠标悬停在左侧的蓝边上并拖动它来改变每个事件和注释的位置。你的第一条注释看起来可能像这样:
让我们自己发现GDevelop
你可以浏览其他教程页面。
GDevelop还带有许多示例和模板!你可以通过访问以下网站找到更多内容:gametemplates.itch.io
你也可以在官方论坛上提问。